Camtasia Fade I Want Video to Continue
Now that you have all of your recordings together it's time to assemble your video. The first step in this process is dragging your media clips (video recordings and other resources such as pictures, audio, etc. you have collected for the video) from the media bin onto your timeline and laying them out roughly in the order that you want them to be played in the final video. This will help you visualize the "flow" of your video and allow you to edit the video in the natural way it will be viewed; from the starting media clip to the ending clip.

Assembling On The Timeline
Once the media clips have been roughly aligned on the timeline, it's time to start the actual editing process. Let's take a closer look at the basic editing tools and features of the timeline to maximize your efficiency when assembling your video:
Click, Drag, Select, and Delete :
You can arrange the media clips on the timeline by holding your left click on the mouse over the media you are trying to move and dragging them to specific areas on the timeline even if they are not necessarily in the point where you want them when you first dragged them from the media bin.
One thing to note is that you can only edit clips that are selected in the timeline, this is done to prevent you from editing pieces of your video that you do not wish to adjust (a clip is selected when it is highlighted or outlined on the timeline). There are multiple ways to select one or multiple clips:
- To select a single clip, left-click on it.
- To select multiple clips, hold "Shift+Click LMB(left mouse button)" on the clips you want to select or alternatively you can click and hold left click on the timeline to drag a selection box around the clips you wish to select.

You will also be able to select and resize clips on the canvas area itself, allowing you to adjust media clips that are playing at the same time, just like you would control them on the timeline.
A Note on the Relationship Between the Media Bin and Timeline:
When assembling on the timeline, you can always go back and delete or add more media clips or duplicates of the same media clip into your timeline as you see fit during the editing process. Once a media clip is added to your project's media bin, you will always be able to access the original unedited media from the media bin as long as you do not delete it from the media bin itself.
For example, if you edit a media clip incorrectly on the timeline and want to start over with the original version of the media clip, you can delete the clip out of the timeline "RMB (right mouse button over the clip) > 'Delete' from drop-down menu" or "Delete" on Mac "Backspace" on Windows, then drag the original clip from the media bin into the timeline to start editing it again.
The Trim Feature :
The Trim feature allows you to adjust the beginning and end of a selected clip. By hovering your mouse over the beginning or end of your clip you'll to click and drag that side of the clip to make it start and stop at the desired place. For example, if you want to cut off the beginning and end of the clip when you are preparing to speak at the beginning of the recording or trying to stop your video at the end of the recording, you can simply take the ends of your clip and drag them into your desired positions.
The Split Tool :

One of your best friends when it comes to editing your videos together in Camtasia is the Split Tool. The Split tool allows users to break apart clips into smaller clips in the timeline, allowing you to delete portions of the recording you don't want to show or making individual adjustments to certain parts of the video that you don't want to reflect over the entire timeline. To split a clip, select it and go over to the split icon on the top left-hand side of the Timeline. You can also press "COMMAND+T" on Mac or "S" on Windows to split your clip. Just keep in mind, that wherever the play head is where the split will take place, but even if the split is a little off from your intended location you can always go back and use the trim feature to adjust the clips.

Other Functions and Shortcuts (ONLY FOR CAMTASIA 3 – ONWARD) :
While the first three functions are the primary tools for clip assembly in the timeline, there are a few lesser-known functions and buttons that will help you in your edits. These features have icons that can be accessed at the top left-hand side of the timeline where the split tool is located.

1. Undo and Redo :
If you need to undo an editing action that you have just completed on the timeline or in the Canvas, you can use the Undo Button or "COMMAND+Z" on Mac "CONTROL+Z" on Windows to go back in time to before you made the edit. If you want to redo that edit again, press the redo button to the right of the Undo Button or "COMMAND+SHIFT+Z" on Mac or "CONTROL+SHIFT+Z" on windows.
2. Cut :
If you want completely move a clip from one part of the timeline and place it in a different part of your timeline without having to click and drag it, you can select the clip or multiple clips and use the Cut Button or "COMMAND+SHIFT+X" on Mac or "CONTROL+X" on windows.
3. Copy :
If you want to make an identical copy of a clip to paste into a different part of your timeline without removing the original one, you can select the clip or multiple clips and use the Copy Button or "COMMAND+C" on Mac or "CONTROL+C" on windows.
4. Paste :
To paste a copied clip or group of clips into a different part of the timeline, use the Paste button or "COMMAND+V" on Mac or "CONTROL+V" on windows. Just keep in mind that the clip or clips will paste at were your play head is located and will go to an empty track.
5. Timeline Zoom :
The Timeline Zoom will allow you to zoom in and out of your timeline content to make precise adjustments to individual clips by zooming in or view the entire video timeline by zooming out. For example, if you are trying to make a precise split on a clip, you can use the timeline zoom to view the individual second or frame marks on the Timeline.
Spacing Clips
It is important to understand how clips work on the timeline and how the timeline translates into your final video. The timeline is a direct reflection of what the timing will be for your video and what is displayed. When a Camtasia project is rendered (turned into its final product such as a playable .mp4 or .mov file), the video starts at 0:00 mark on the timeline and end at the end of the final clip.
When your video is closer to the way you want your final product to look, you want to make sure there is no space between the clips so they flow right into each other. If there is a blank space with no clips anywhere on your timeline before your final clip, there will only be a solid black matte that plays on screen. So, have your first clip pushed all the way to the left side of your timeline at the 0:00 time mark on your timeline and shove clips together so there is no space in between them.
Clips automatically "snap" or attach their respective beginnings and ends together when you drag them close to each other on the timeline, you can see snapping occurs when it is indicated by an adjustment line that appears between two clips when dragged close to each other. This is done to prevent blank spaces or clips being overlapped where they should not. Clips also snap to either side of your playhead so make sure to have your playhead pushed away from the end of clips you are trying to push together.

The Tool Bin is where the different editing features and effects are stored in "bins" or a tabbed system. While we have already covered the Media Bin, let's explore the other editing features and effects that we can find in the Tool Bin by clicking through each bin on the left-hand side of your Editor.

A Note On The Properties Tab For Tool Bin Effects and Assets:
Some tools, effects, and assets have individual parameters that can be adjusted to suit the user's preference. Once a feature has been applied to the timeline, click on the clip it is housed in and select the "Properties" button above the timeline to open up the hidden properties tab on the right-hand side of your screen. This tab will allow you to adjust individual parameters such as color, text, size, etc.
The Library Bin (ONLY FOR CAMTASIA 3 – ONWARD) :

The Library Bin is where you can browse the library of assets such as pictures, music, icons, and videos that Camtasia has pre-included in the software. You can use the dropdown menu at the top of the Bin to select a different area of your computer you would like to take assets from, but by default, it will open up to the included Camtasia Library. You can add more of your own assets to these folders by clicking on the plus icon or click on the "Download More Assets" to browse Camtasia's online catalog of stock assets.
WARNING ON CAMTASIA STOCK ASSETS ONLINE:
THE USE OF CAMTASIA STOCK ONLINE IS NOT RECOMMENDED BECAUSE IT INVOLVES EXTRA COSTS TO THE USER, YOUR CSU LICENSES WILL NOT COVER THE COST OF THE ASSETS AND THE USE OF CAMTASIA'S LIBRARY WILL INVOLVE SIGNING UP FOR A PERSONAL ACCOUNT.
The Annotations Bin :
The Annotations Bin is where you can add text or shapes into your project to draw your viewer's attention to a specific part of your video or to communicate information through text. The Annotations Bin has six separate tabs within it to help organize these assets.
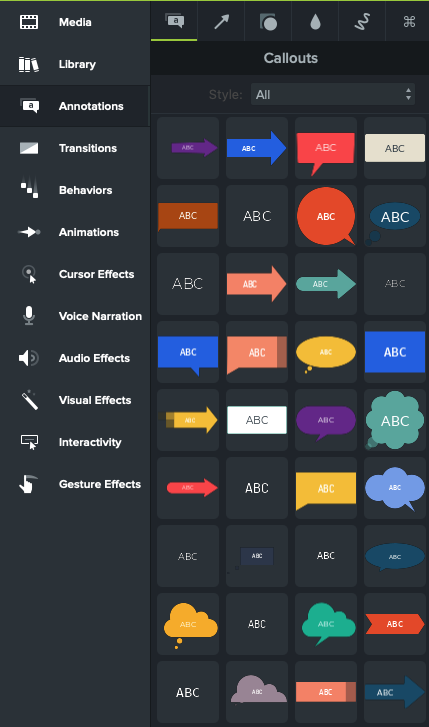
Callouts Tab :
The Callouts Tab is where you can add text over your video. To add a callout, just drag the callout onto your timeline like you would any other pieces of media. This will create a media clip your callout will live in. By double-clicking on a callout in the Canvas, you can change the text within the callout clip. From here you can go over to the properties tab to modify the size, color, and text style of the callout to fit your needs. If you can't see your callout, make sure it is in its own track above the video clip you want it displayed in.
Arrows and Lines Tab :
The Arrows and Lines Tab is where you can add arrows and lines into your video. They can be dragged onto the timeline and live in their own media clip. To change the direction and size of an arrow or line, click on the arrow or line within the Canvas. This will show the two control points that will allow you to place the two ends of the arrow or line wherever you desire. Individual parameters of arrows and lines such as color and size can be adjusted in the Properties Tab.

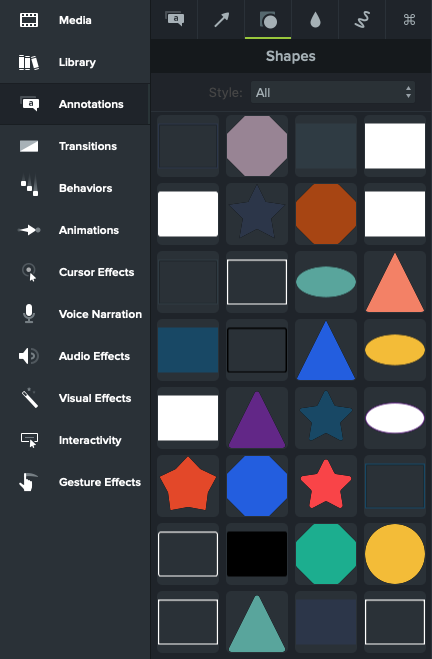
Shapes Tab :
The Shapes Tab is where shapes can be added to your video. They work just like the other assets mentioned above and can be modified in the Properties Tab.
Blurs and Highlights Tab :
The Blurs and Highlights Tab is where you can drag specific shapes onto your video that are designed to either highlight or hide specific parts of your video. They work just like the other assets mentioned above and can be modified in the Properties Tab.
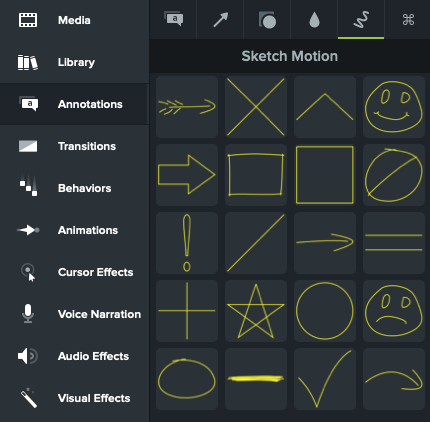
Sketch Motion Tab :
The Sketch Motion Tab is where you can add animated Shapes and arrows into your video. They are slightly more limited when it comes to editing, these assets can be dragged and resized within the Canvas but can only be edited for color and thickness within the Properties Tab.
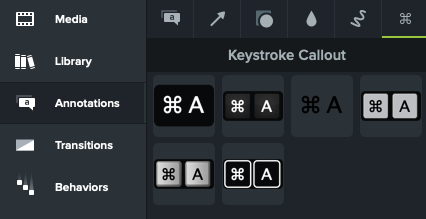
Keystroke Callout Tab :
The Keystroke Callouts tab is where you can visualize keyboard shortcuts for you viewers. For example, if you were creating a tutorial video for a specific application, you can use a keystroke callout to show a visual graphic of what buttons a user would need to press on their keyboard in order to perform an action. These callouts can be modified in shape and size by adjusting them on the Canvas. The keys within the callout can be edited by going over the Properties Tab and click on the "Keys" box to highlight it. Once this box is highlighted, you can perform the shortcut on your keyboard to change the keystroke visual.
The Transitions Bin :
The Transitions Bin is where you can add transitions to the beginning and end of two clips that are snapped to each other on the timeline or modify a single media clip. To add a transition, begin to drag a desired transition onto your timeline. You will notice that the beginning and end of every clip will highlight itself, indicating the places that you can add transitions. If you drag and drop a transition to either end of a clip, it will only create a transition to that end. If you drag and drop a transition to the middle of a clip, it will add a transition to both ends of a clip. Finally, if you drag and drop a transition between two snapped clips or clips that are touching each other on the same track, it will create a transition between the clips.
You can tell that a transition has been applied to a clip when you see the Transition Handles appear at the ends of the video in your Timeline. You can modify how long a transition will take by click and dragging the Transition Handles left and right on the ends of the clips they are applied to. To remove a transition from the clip, select the transition on the timeline and press the "Delete" key or right-click on the handles and select "Remove Transition".

The Behaviors Bin :
The Behaviors Bin is where you can add animation effects that modify annotation clips within your timeline. Behaviors are different than transitions because they can happen in the beginning and end of a clip and throughout the clip, depending on your desired outcome.
You can customize how the behavior enters the canvas, what it does when it's on the canvas and how it leaves by adjusting its behavior properties in the Properties Tab once it is applied by dragging onto the desired clip in the Timeline. To remove a behavior from a clip, select the clip and go over to its properties in the Properties Tab and click on the "X" next to the name of the behavior.
The Animations Bin :
The Animations Bin is where you can apply custom camera movement to your video clips that you have in your timeline. For example, the animated GIFs in this guide were created by recording a full Camtasia window and then the "Scale Up" and "Scale Down" animation were applied to the recording clips to show the specific features that were being interacted with on-screen.
To apply a animation to a clip, drag it from the bin onto the desired clip in the timeline. You will then see a arrow appear on the clip with two dots at either end, these two dots are the Animation Control Points. These control points are where the animation begins and where the animation ends and the space between them determines how quickly or how slowly the animation plays in the video.
Using the "Scale Up" animation as an example, let's try setting up an initial and ending scale to the animation (what is being shown in the Canvas before and after the animation takes place). The initial scale of a clip can be adjusted by moving the Timeline Playhead before the first Animation Control Point and going over to the Properties Tab to adjust the scale of what is being shown before the animation (which will most likely be the original clip size if it has not been modified after dragging it onto the timeline). To adjust the Ending Scale, drag the Timeline Playhead to after the second Animation Control Point which will light up red, indicating you are now working on the scale of what is displayed after the animation.
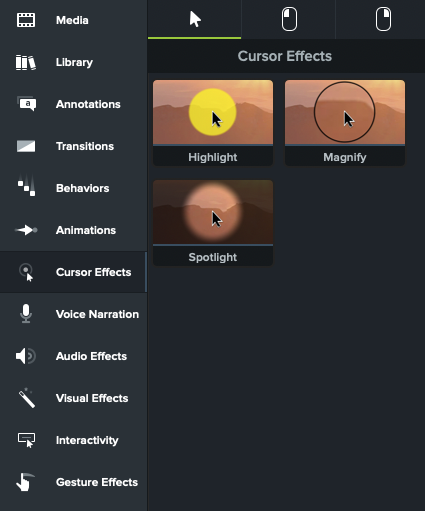
The Cursor Effects Bin :
The Cursor Effects Bin is where you can automatically track your cursor movement and actions in that clip. After dragging this effect onto your clip in the Timeline, it will automatically track cursor movements and clicks with no editing necessary. This feature is useful for web and application tutorials when you want to direct your viewer's attention to what areas of the screen you are interacting with.
The Voice Narration Bin (ONLY FOR CAMTASIA 3 – ONWARD) :
The Voice Narration Bin allows you to make voice-over narration for the video you are assembling within your timeline. This feature works just like audio recordings would in the Recording Window. You can select which microphone you wish to use, mute your computer speakers during the audio recording to prevent audio feedback, and the Voice Narration Bin even provides space for you to type or paste a script to reference during the voice recording.
To record a voice over, drag the Playhead where you want your narration to start and press the "Start Voice Recording" button in the Voice Narration Bin. Once you are done with the voice over, press the "Stop" button in the bin and the audio recording you just made will automatically drop itself into the timeline depending on where your Playhead began to move and where it ended. You will still be able to edit, adjust, and move this clip in the Timeline and a master copy will save to the Media Bin.

The Audio Effects Bin :
The Audio Effects bin is where you can enhance or correct audio for media clips. Audio effects can be dragged onto a clip in the timeline and modified through the Properties Tab to produce specific outcomes. Let's go over these effects and how to use them to enhance your videos:
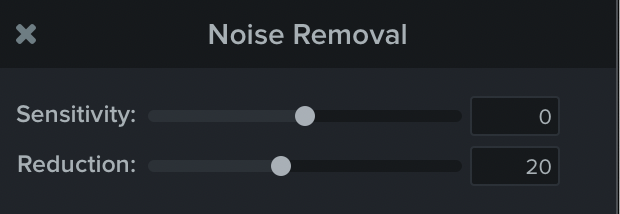
Noise Removal :
The Noise Removal Tool helps reduce the background noises and interference hisses that may happen during an audio/video recording. In the Properties Tab, Windows users can automatically remove noise by pressing the "Analyze" button and using the "Amount" slider to get the desired noise removal level when the Noise Removal effect is added to a clip. Mac users can manually adjust their noise removal "Sensitivity" and "Reduction" sliders to achieve their desired levels.
Volume Leveling :
The Volume Leveling Tool helps even out audio levels throughout a clip, equalizing the maximum and minimum peaks in your audio. When this is applied to a clip, you can go into the Properties Tab to either choose a automatic amount of audio level variation from the "Variation" drop-down menu or manually adjust the "Ratio", "Threshold", and "Gain" sliders to dial in the desired effect.

Fade In/Fade Out (ONLY FOR CAMTASIA 3 – ONWARDS) :
The Fade In/Fade Out effects creates a smooth audio transition at the beginning or end of your clips with either an increase or decrease of sound. This will create an Audio Point on your audio level when applied to a clip in the Timeline that can be dragged along the clip to adjust the speed at which the fade happens.
A Note When Working with Audio Points and Custom Levels:
When working with audio editing an important tool is the independent clip levels that can be found on a clip within the timeline. The Audio Level (volume of the clip) is represented by a small teal line across the clip and is set to 100% or original recording volume by default. To make the clip volume louder or softer, click and drag the line either up or down.
To edit a smaller section of audio within a clip, double click on the clip's level to create an Audio Point. Audio Points will specify the beginning ends of audio edits and will automatically ramp the audio before and after the section between two Audio Points to create a smoother transition of increase or decrease in audio up to or down from the edit. The suggested method of working with custom audio points is to create at least four points for each edit. The two inner points will control the volume of the section you are trying to modify and the two outer points will create a smooth ramps in and out of this edit to make it seem more natural.

Captioning (ONLY FOR CAMTASIA 3 – ONWARDS) :
Captioning is the ability to include text of your video transcript within the video to improve accessibility for audience members. Captioning is an advanced process that is not recommended to be done through the Camtasia Editor. CSUCI offers captioning services for education material that meet legal DASS requirements and more information about captioning services provided to faculty of CSUCI can be found here.
Clip Speed :
Causes audio and video clips to playback faster and slower when applied. This effect is also not recommended for use because it can distort audio and video rendering it unusable. More information about clip speeding can be found here.
The Visual Effects Bin :
The Visual Effects Bin a collection of effects that can be applied to video clips on the timeline. Once these effects have been added to a clip, their individual parameters can be edited from the Properties Tab. There are little to no visual effects that would be useful to your day to day workflow for creating and editing videos, but more information about individual visual effects can be found here.

The Interactivity Bin (ONLY FOR CAMTASIA 3 – ONWARDS) :
The Interactivity Bin is where you can add interactive quizzes and response questionnaires into your video using the Timeline. This is not a recommended feature to use and will not be covered due to the advanced and confusing control system and the fact that it requires a specialized player to view the final video once it is exported and is not supported by CSUCI online classroom grading. More information about the Interactivity Bin can be found here.
The Gesture Effects Bin :
The Gesture Effects Bin works just like the Cursor Effects bin by automatically tracking touch commands that happen during a recording of a touch screen enabled device. After dragging this effect onto your clip in the Timeline, it will automatically track gestures like pinches, swipes, and taps with no editing necessary. If you do not have a touch screen device, gesture effects will not work in your video.

Tips and Tricks for Workflow and Editing
When you are working on creating videos on a weekly or daily basis, there are a few tips and tricks that you can follow to help you efficiently produce your video and to prevent frustrations and lost time as a content creator.
Setting Up Your Save Locations Manually and Understanding Camtasia File Types:
Saving a Camtasia Project & Project File Types
The first thing you should do when you open up a new Camtasia project is set up where your project will be saved, even if there is no content or clips in it yet. This is done to insure your project will remain organized. When you are in the Editor, you can save your Camtasia project by going to "File>Save or Save As… " or "COMMAND+S" on Mac computers or "CONTROL+S" on Windows computers. This will create either a .TSCPROJ or .CMPROJ file on your computer in the location you choose to save it in. The "PROJ " file type is the project itself. You can click on this file in your computer to access the project and open Camtasia to the project's Editor.
The best practice is to create a folder on your computer for each project you are working on and saving all of your related files there. If you forget to choose a custom destination or can not for some reason, the default save location for Camtasia project files on your computer will be " C:\Users\username\Documents\Camtasia" (AKA your documents folder).
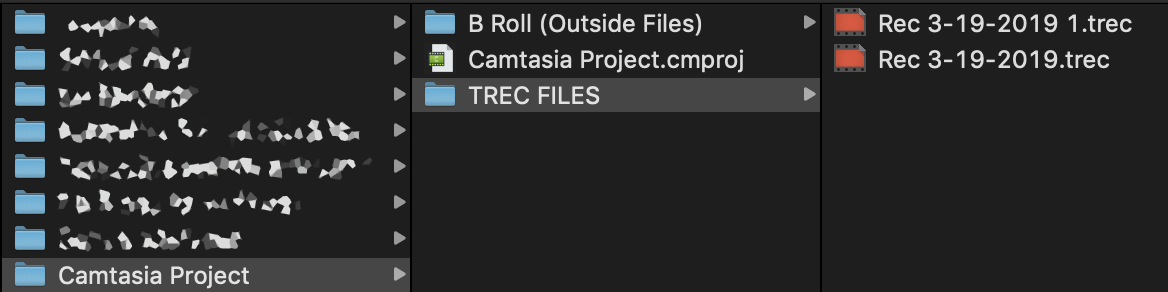
Saving Recording Clips & Recorded Clip File Type
.TREC files are the default file format produced after recording in Camtasia Recorder. TREC stores audio, screen recording, camera recording, and metadata into a single package. It is important to know where your .TREC files are and they are pair with your project file so your project does not "break" (AKA cannot find or play its recording files) if you happen to move your project file somewhere else on the computer or onto the cloud. By default, Camtasia automatically names and saves all .TREC recordings to the Camtasia to the default location: "C:\Users\username\Documents\Camtasia ".
To add recordings and other media into your video project file (.TSCPROJ), select " Camtasia > File > Import > Media" . Select the files in your project directory (same default location as mentioned above). Camtasia imports the files into the Media Bin or simply dragging and dropping them from two open Camtasia project Editor windows will do the same thing.
You can configure Camtasia Recorder to open a Save dialog to enter a filename and location for each .TREC recording file after recording to make this kind of file management easier:
For Windows:
- In the Camtasia Recorder, select "Tools > Options".
- The Tool Options dialog appears. Click the File options button.
- Select the Ask for filename option.
- Click OK.
- After stopping the recording, a Save dialog appears where you can enter a filename and save the recording to the project folder.
For Mac:
- In the Camtasia Editor, select "Camtasia 20xx > Preferences"
- Select the "Recording" Tab in the Preferences Window.
- Go to the "After recording:" dropdown menu and select "Prompt to Save".
Constantly Saving Your Files:
There is always a chance that your application can crash when editing a video project, so make sure to manually save your project every few minutes while you are editing it down to a final product. Another good rule of thumb is to do this before and after large edits or changes to your project such as apply an effect to all clips on the timeline or doing custom animations because these types of edits put strain on your computer's processing power and could crash the application.
Working on Multiple Project Files:
(IF NOT MANUALLY HANDLING FILE STRUCTURES) If you know you are going to try to record and edit multiple videos in one editing session, start with just one project. While you cannot export different videos on the same Timeline without having to clear and reassemble the Timeline over and over again, you can record all of your clips for multiple videos in the same project file and then disperse them to their individual projects. For example, if you were going to make three separate videos on three separate parts of a website in one recording session, you can record all of your screen recording clips into one project, then open up two or three new projects and drag and drop the clips into the separate project's media bins to start editing the individual videos.
Repairing Lecture Mistakes:
Sometimes you will notice mistakes after a long Camtasia recording session (like lecture recordings). Instead of having to record the whole lecture over again, there are a few things you can do to edit around these mistakes:
Inserting Fixed Lecture Slides:
If you notice a misspelling in a recorded lecture slide you can use an image of a corrected version of the slide to repair it. First, edit your original slide in PowerPoint or Google Slides and save it as an image file such as a .jpg or .png.
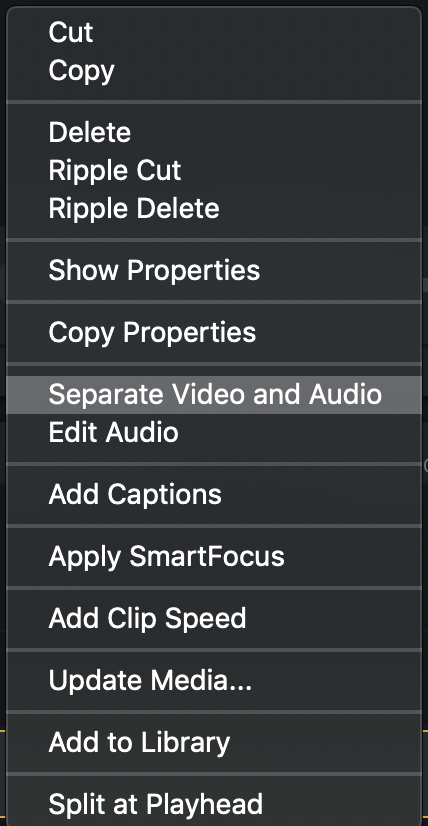
Next, import the file into Camtasia and prepare the clip you are editing for the replacement. In most cases, screen recordings of slides will have an audio file attached within the clip. Use the split tool to create a clip out of the section you are trying to edit. To separate a clip into the individual audio and video clips in your timeline, right-click on the clip and select "Separate Video and Audio " from the dropdown menu.
When the split clip is separated, delete the video clip and drag the corrected image into the timeline where the video clip once was. Resize the image to fit the Canvas and use the trim tool to keep the image playing where the original video clip once was, creating a seamless repair.

Editing Around Incorrect Audio, Outtakes, or Noises
Sometimes you will need to do a second take of a slide while recording a lecture or edit around a large cough or other disturbances.
During the recording, give yourself a moment of pause to reset yourself and try the slide again, then, after the recording is done, use the timeline to correct the clip.
To take out a mistake or seperate takes within a recorded clip, simply split the mistakes from the rest of the clip and delete them from the timeline. You can use the " Timeline Zoom " feature to make precise splits, only trimming out the clip parts that you don't want in your video. After the mistakes are taken out, drag the remaining clips in the timeline to fill in the gap where the mistakes were and keep editing.
While editing static video like lecture slides, editing outtakes and audio trimming usually goes unnoticed by the viewer because there is no movement in the video which would give them a visual indication of the edit. However, if you are trying to cover up this type of edit in a moving video, you can use a " Fade" Transition between the clips to make the edit seem more natural and less jarring to the viewer.
Source: https://knowledgebase.cikeys.com/knowledge-base/editing-videos-in-camtasia/
0 Response to "Camtasia Fade I Want Video to Continue"
Post a Comment